- Published on
How to Quickly Collect LinkedIn Profile Data
- Authors
LinkedIn is the world's largest professional network, with over 700 million users across the globe. It is the go-to platform for professionals to showcase their skills, network with other professionals, and search for job opportunities. However, when it comes to collecting LinkedIn profile information can take a lot of work.
LinkedIn is a vast platform with millions of profiles, making it difficult to manually collect information from each one. It is impractical to browse through each profile and gather the necessary data, mainly if you have to collect data from many profiles. However, some tools, such as Smart Paste, make it as easy as clicking a button to gather the data you need!
In this post, I'm going to share how to set up the Smart Paste Chrome extension to quickly collect the data you need with a click of a button. If you haven't already, install the Smart Paste Chrome Extension, which you can find here.
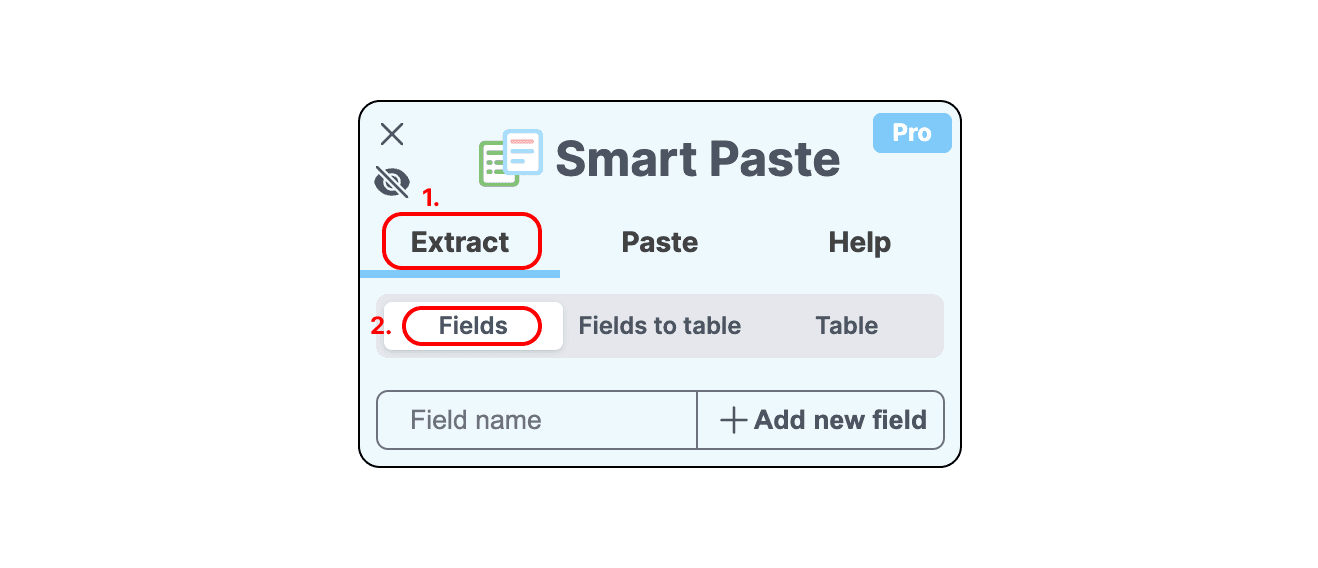
Once you've installed it and opened it by clicking it on the extension page, you should see a sidebar pop up on your page. If you don't see it, try refreshing your page! We're going to set up the extract fields feature in Smart Paste. First, go to the Extract tab and click Fields as shown below:
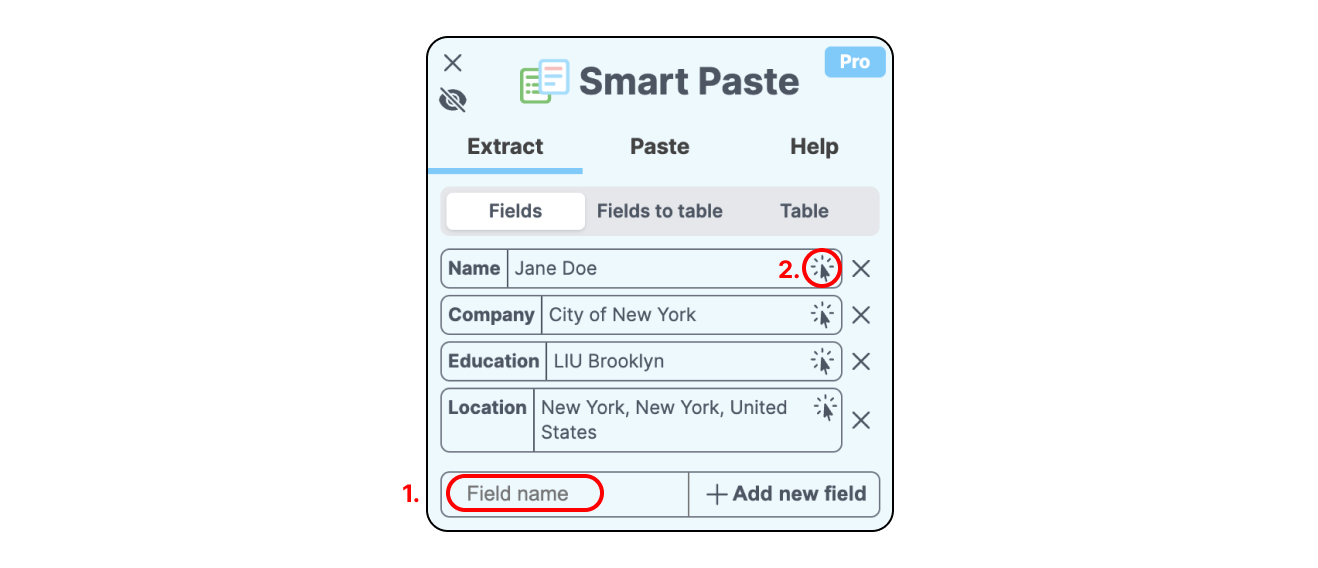
Next, we're going to name the fields we want to collect from a profile. In this case, we want their name, current company, school, and location. You can add your field names by using the Field names text input and adding the fields you want to collect. You can select the field name to the corresponding field by clicking on the cursor icon in the field you just added:
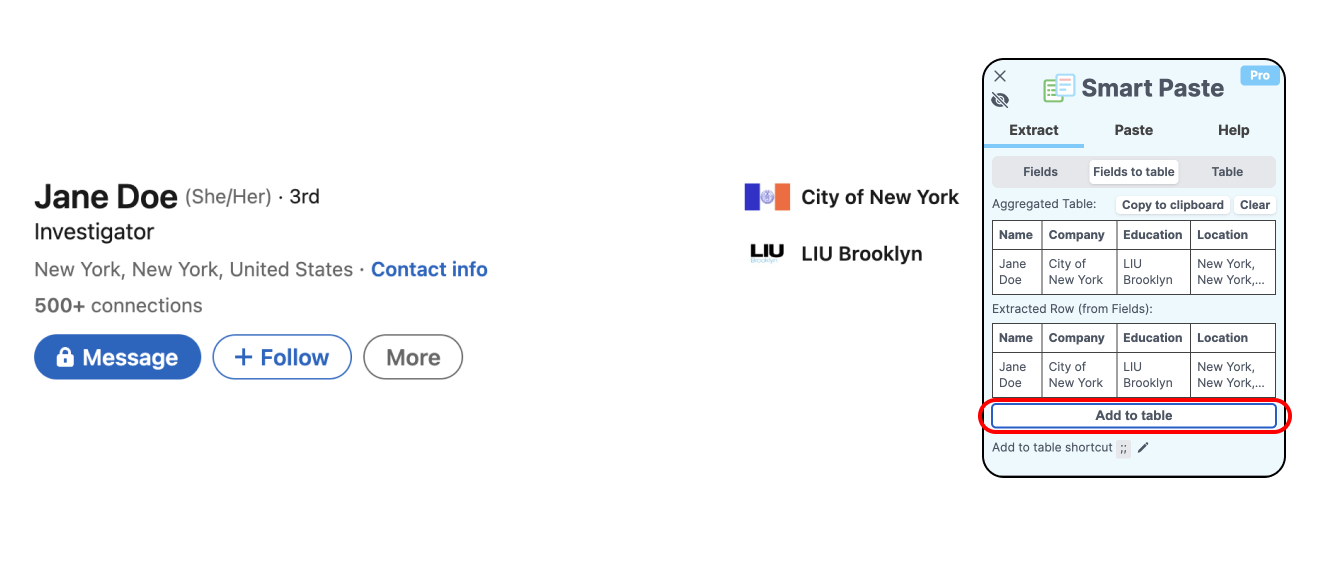
After you confirm that the fields look right, go to the Fields to table section. This should show both your aggregate table and a preview row. If you don't have an aggregated table so far, then only the preview row will show. If you're sure you want to add this row to your table, just press add to the table, and the table should have a new row added (or an entirely new table should show up as shown below:
And that's it! Now if you want to collect more people's information, you go to their profile, and the fields should automatically be populated with the correct data. All you need to do is verify the preview row and make sure that this is the data you wanted in your aggregate. There are occasions when the data might show up as null. If that happens, just quickly go back to the Fields mode and correct it by pressing on the cursor icon in the field and selecting the correct text again.
When you're done collecting information, all you need to do is press Copy to clipboard and then paste it into your desired spreadsheet!
Thanks for reading, and I hope this helps you move faster and save time in your jobs. We're always looking for feedback, so if you have any, don't hesitate to email us!