- Published on
How to Autofill PDFs From Excel Tables
- Authors
Filling PDFs from Excel or Google Sheets tables can take a long time or could easily lead to mistakes if you're not careful.
Luckily, we've built Smart Paste, a chrome extension, to help you swiftly fill out PDF forms.
First, install Smart Paste. You can find the installation instructions here. Ensure you've correctly set the proper permission settings on the extension management page. This makes sure that your browser can open local PDF files in the browser.
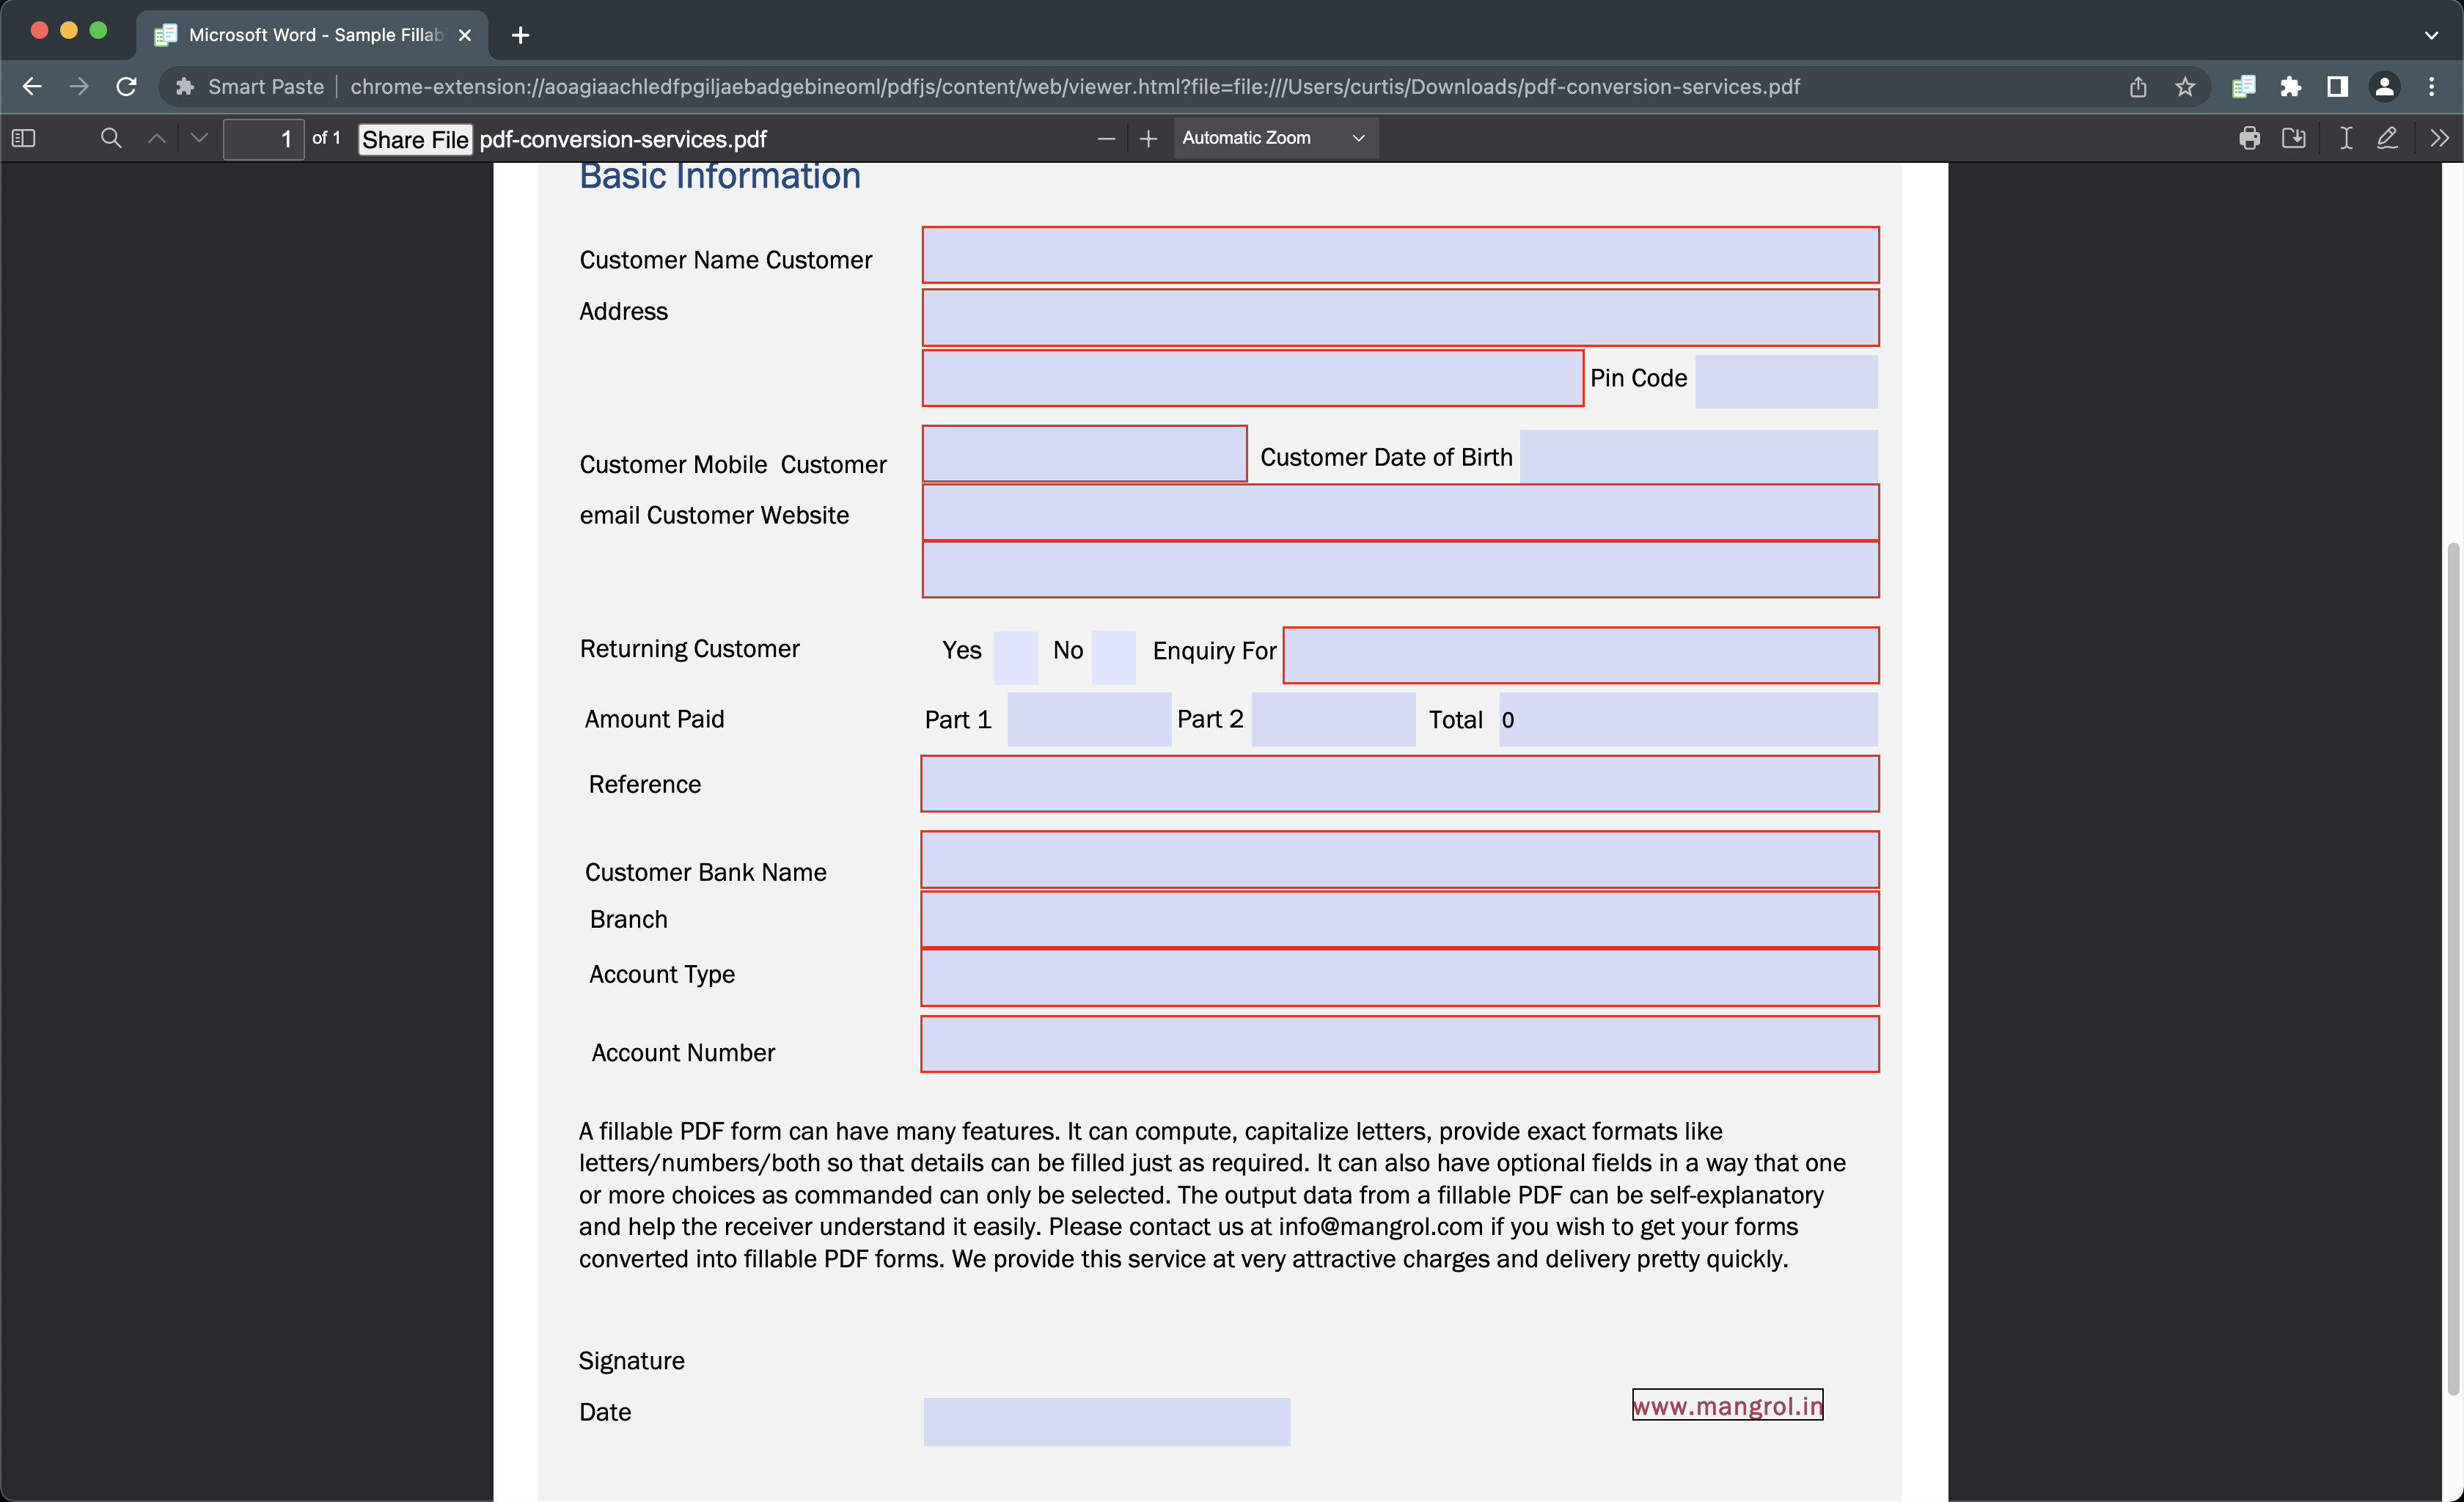
Next, open the PDF file in your browser with the form you want to complete. A page like this should show up:
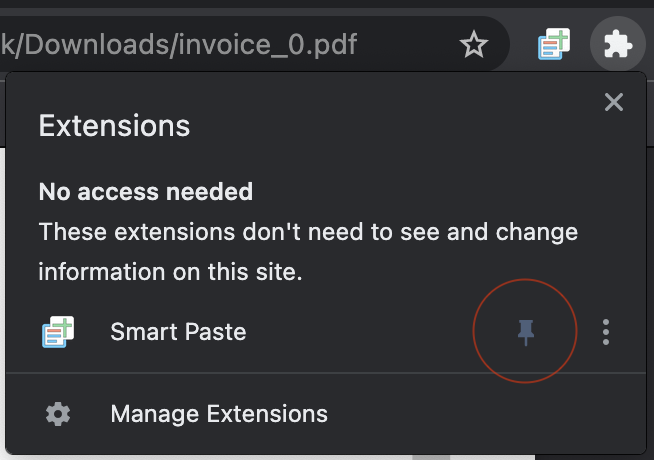
Pro-tip: Pin the Smart Paste extension to your browser to easily access the extension by clicking on the thumbtack icon in the extensions menu
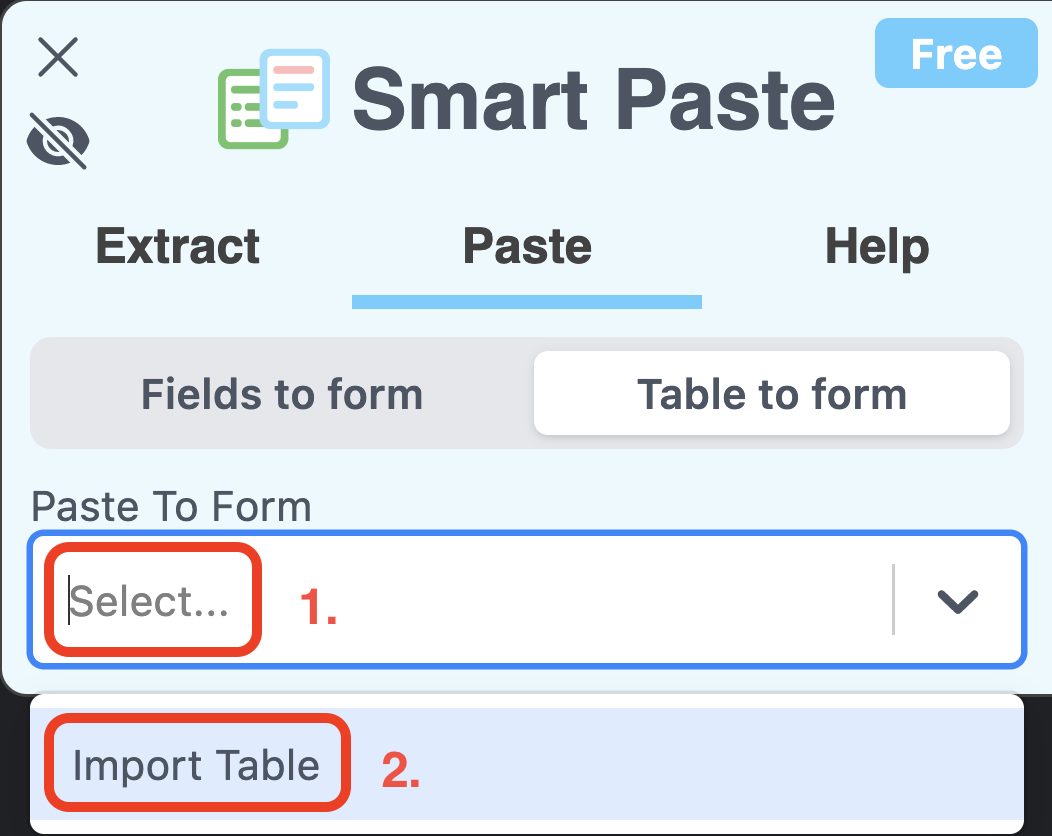
Next, open the Smart Paste menu in your extensions tab and press Paste. Afterwards, press Table to Form.
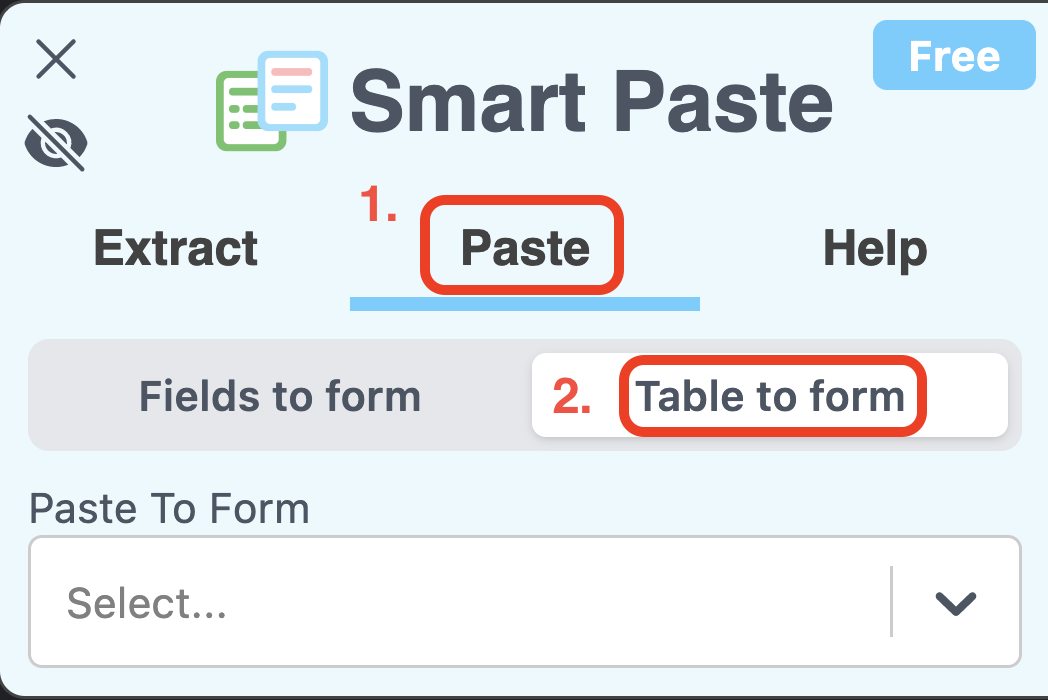
Next, click the "Select..." box and then "Import Table". This will show a text box where you can paste your table from Excel.
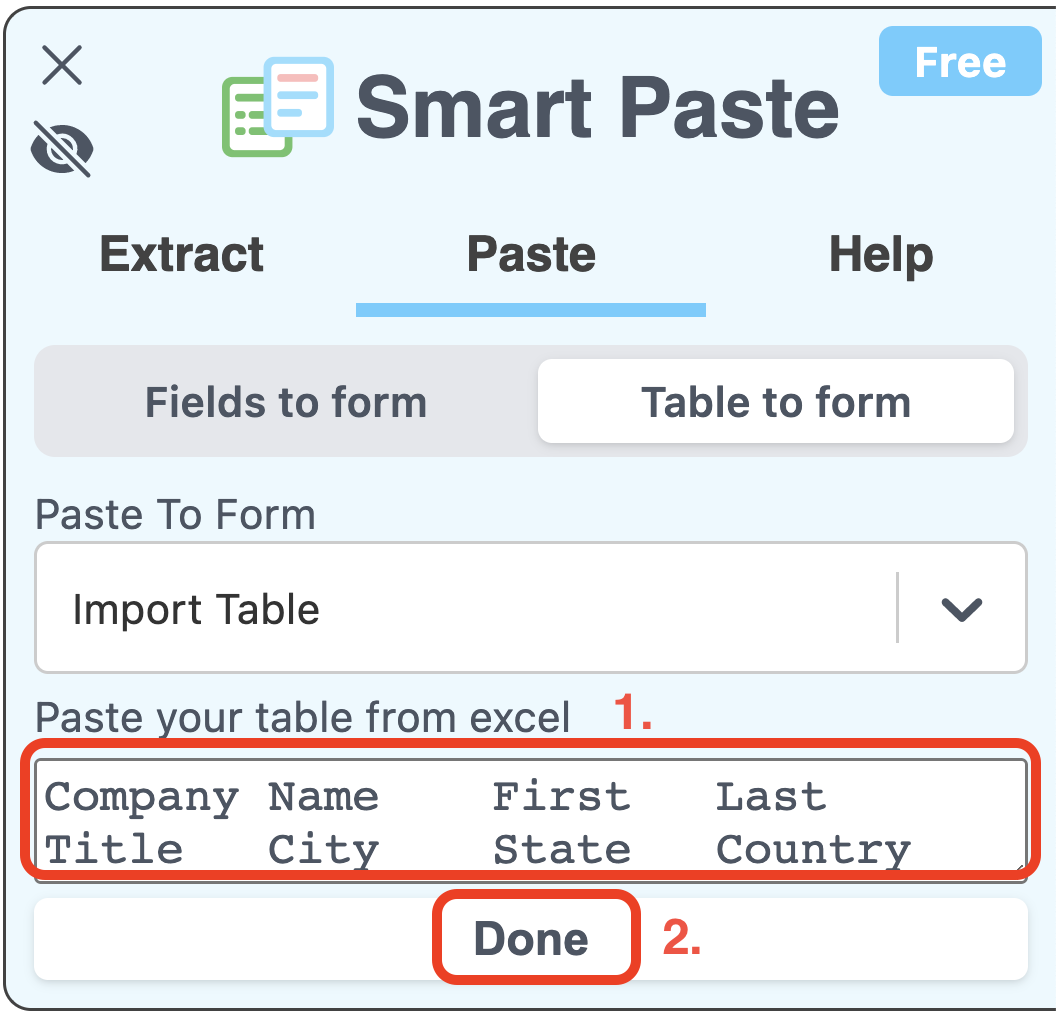
Afterwards, go to Excel or Google Sheets and copy the data you want to fill the form with. You can press Ctrl/Cmd + A to select everything before copying the data. Make sure that you are copying the headers as well!

Go back into the PDF viewer, and paste your data into the textbox. Hit "Done" to import your table.
Note: If you don't see your table after pasting, it means that you pasted empty columns and rows as well. This is okay! You correctly copied your table. Just press done!
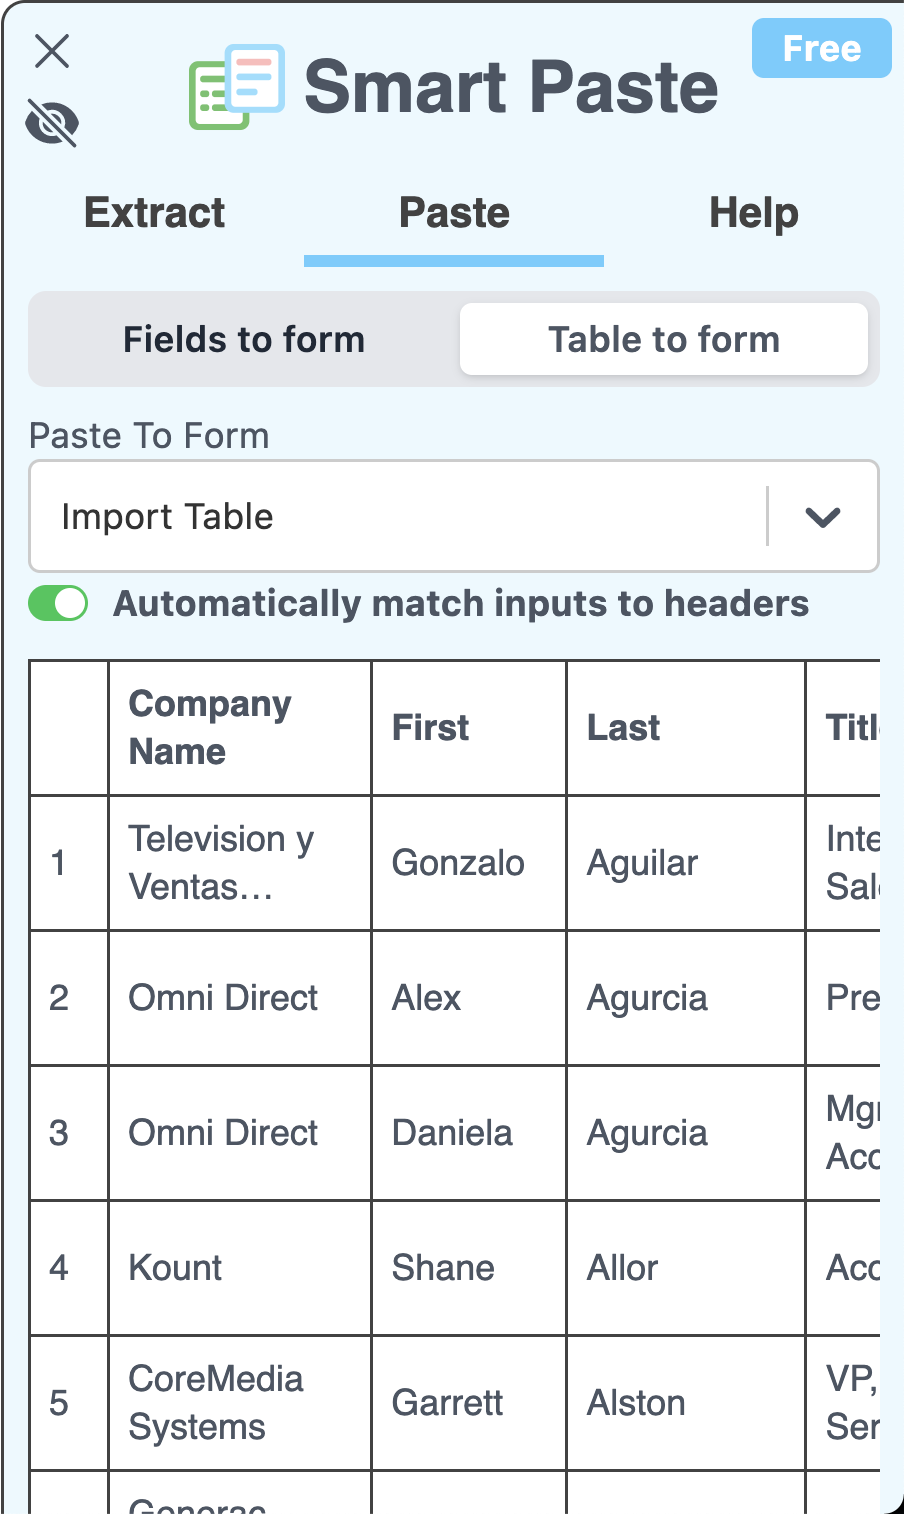
A preview of your table will now appear.
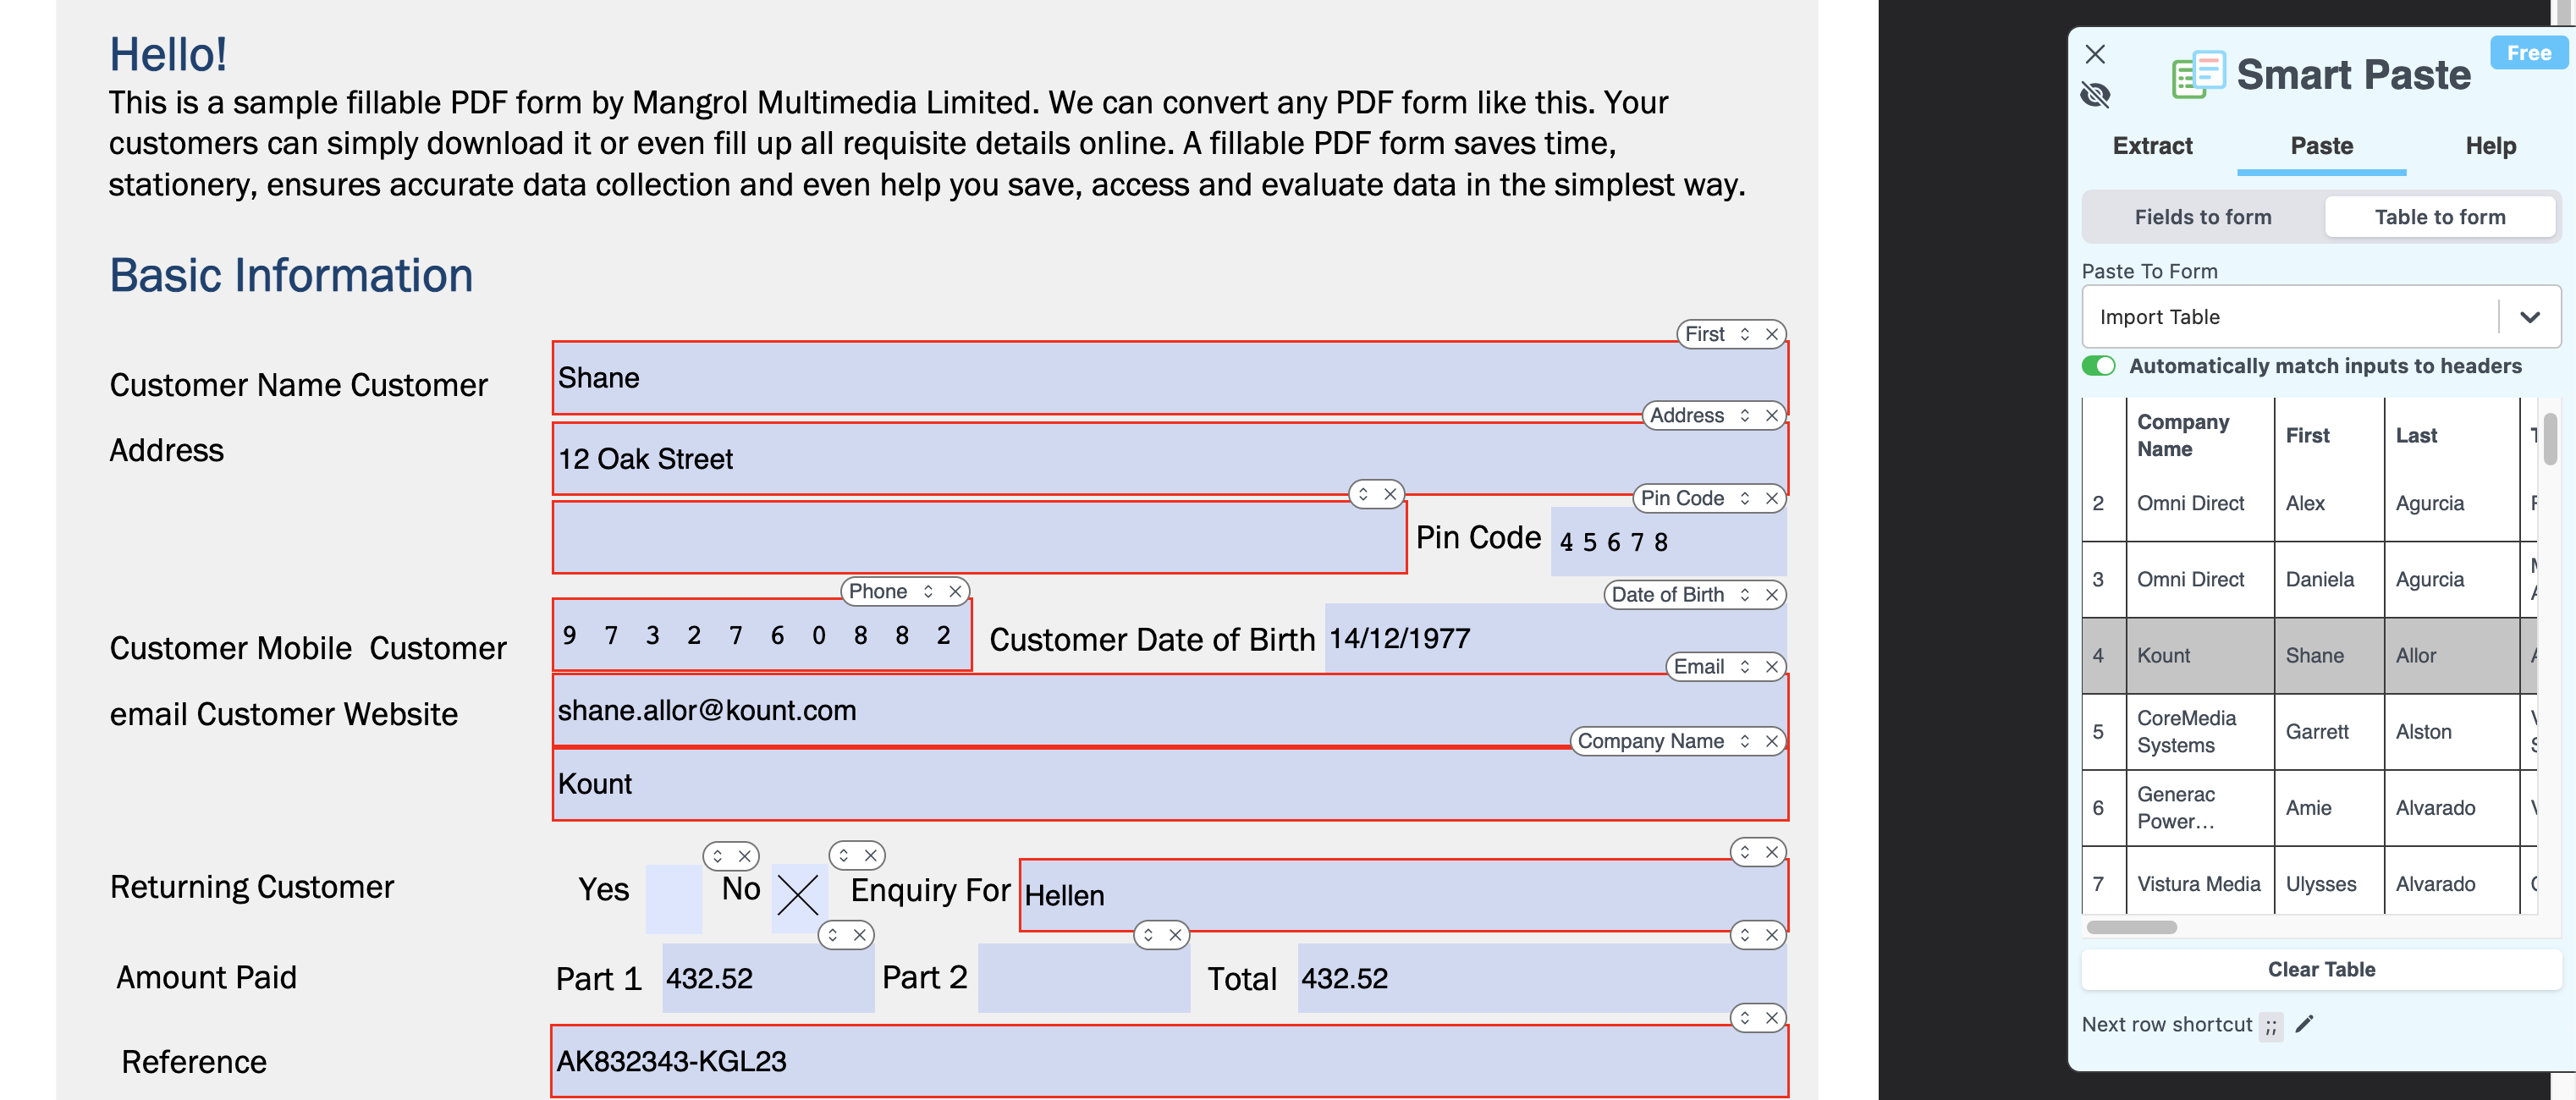
If you look at the form, you'll see overlays that look like "pills". These icons will make sense in a moment. For now, click on the vertically pointing arrows on the first pill.
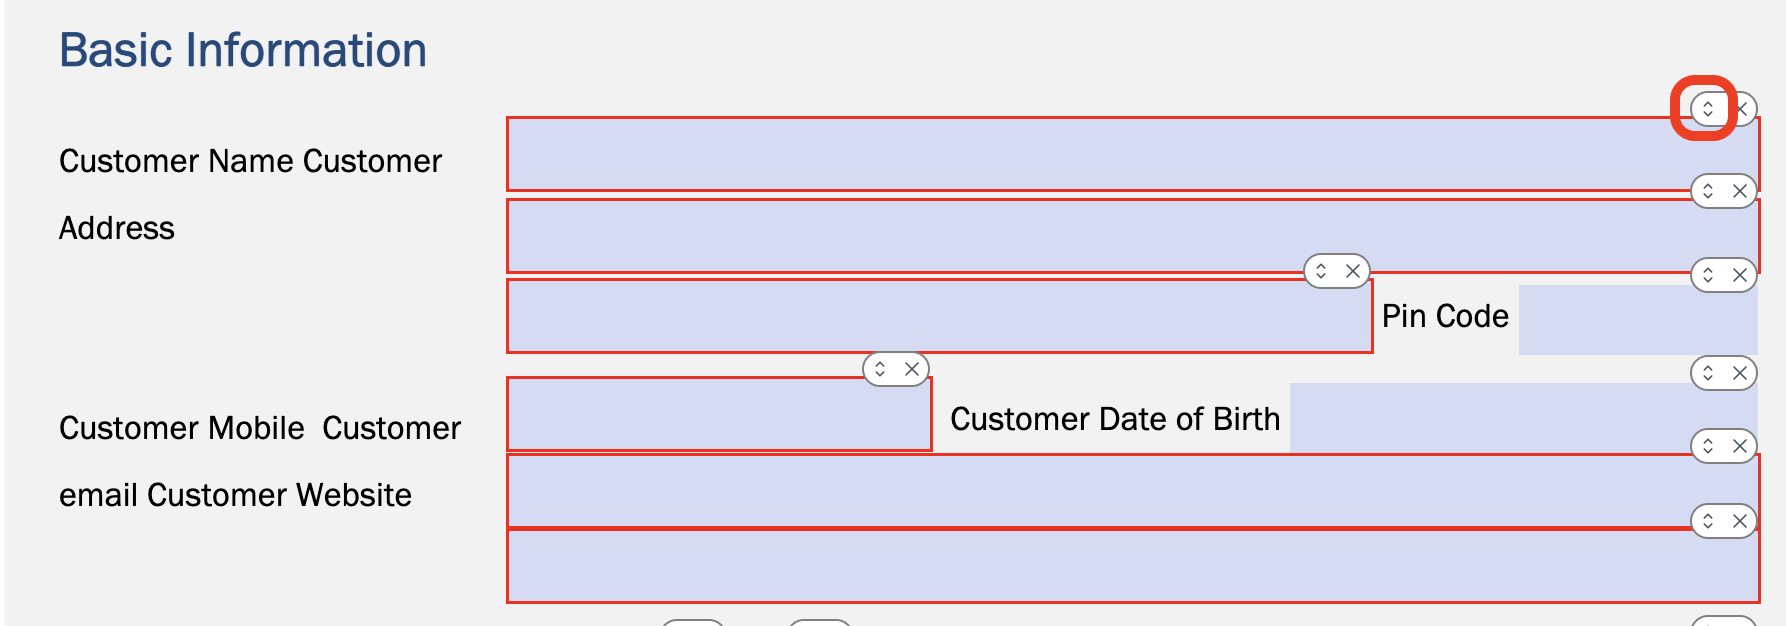
A dropdown will appear with all the headers of your table. Since this input is for the customer's name, I will click the "First" element in the dropdown. This tells Smart Paste to put the data from the "First" column in the "Customer Name" input.
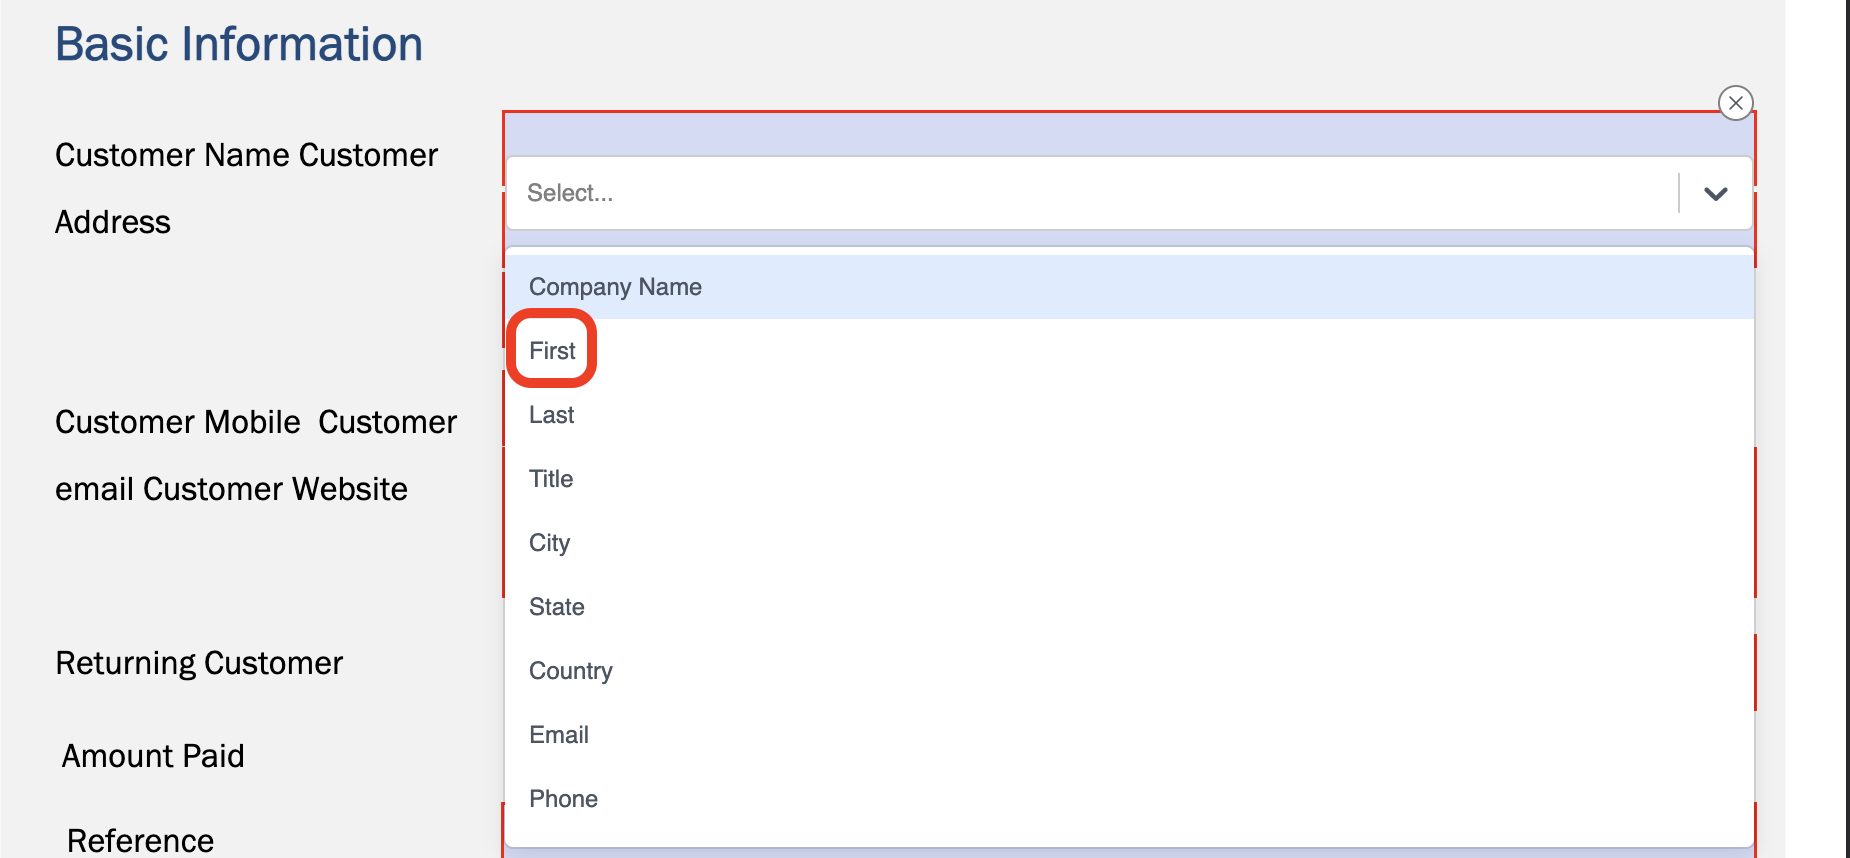
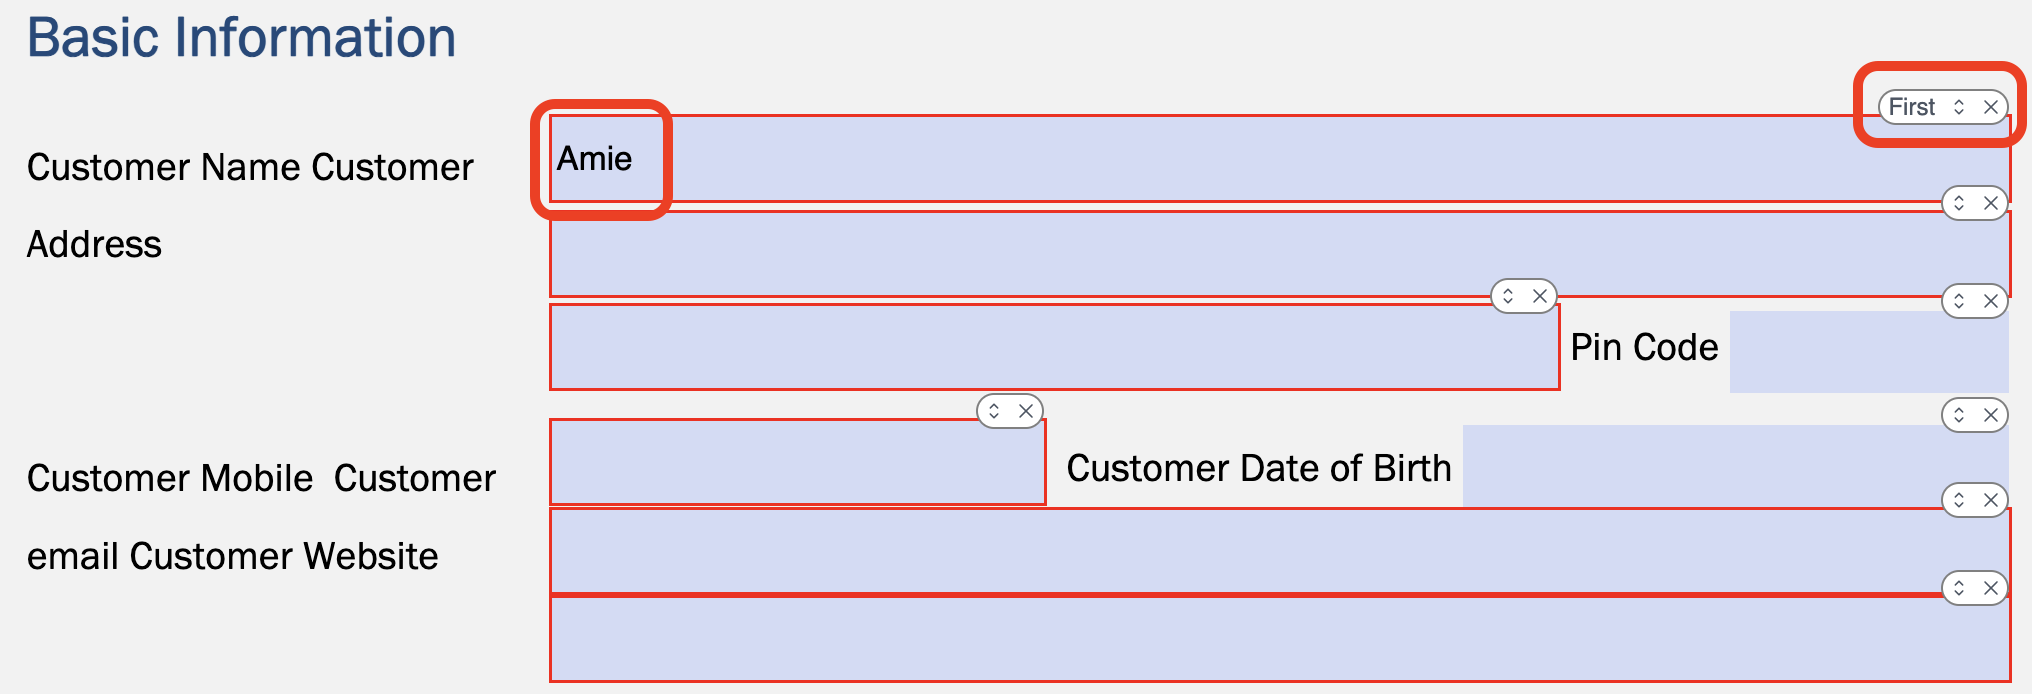
After we select the "First" header, the data for the first row in the "First" column will automatically be filled in. Notice that the pill now has the word "First" in it, which tells you it is reading data from that column.
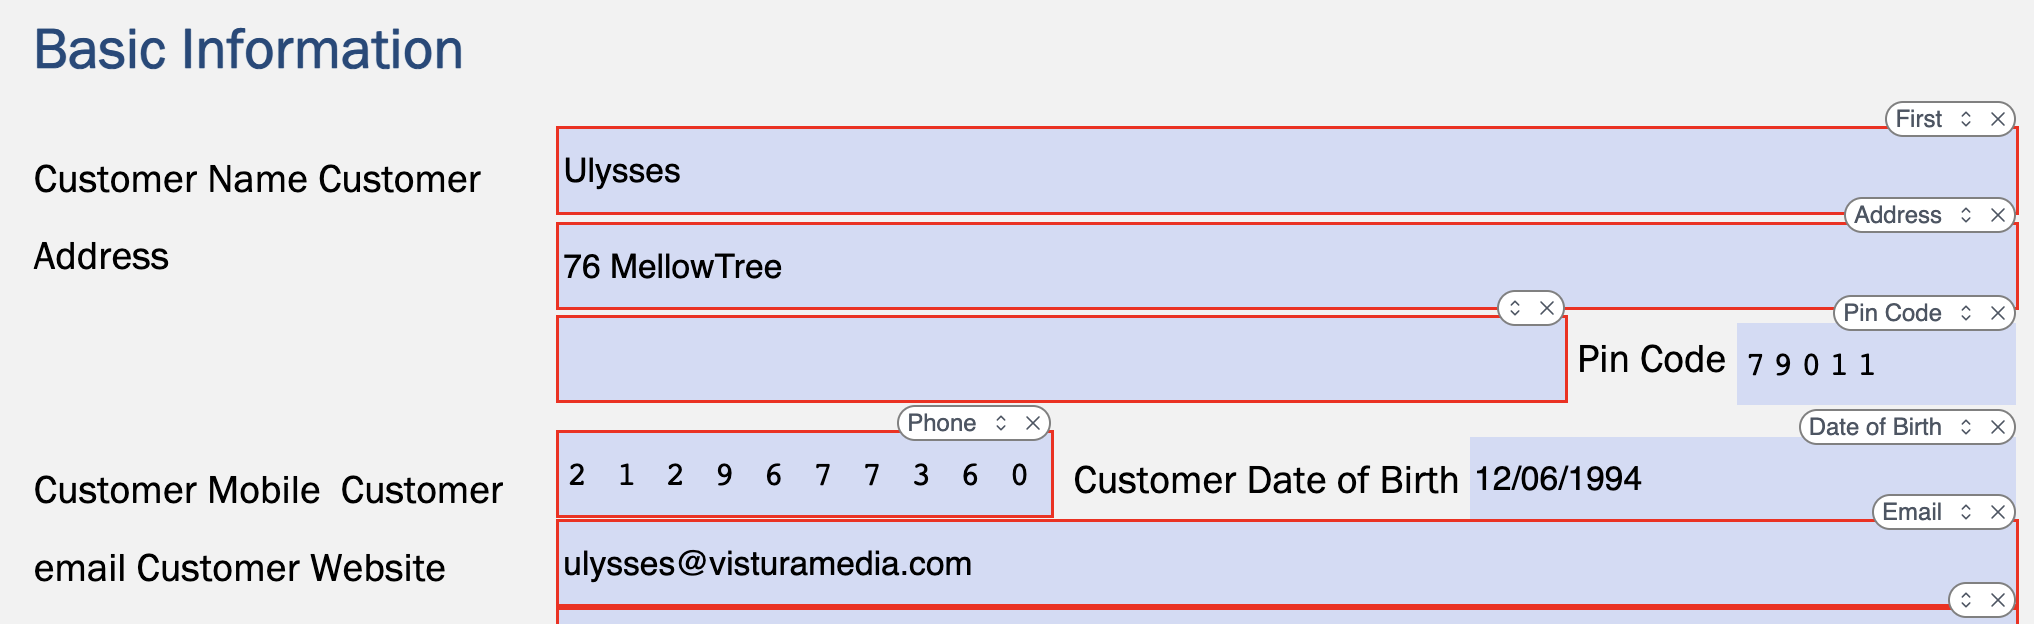
Here is how the form looks after we've selected the headers for each pill.
Here comes the fun part. If you click on any table row, the form will automatically be filled with that row. This means that you can fill out the form in a matter of seconds!
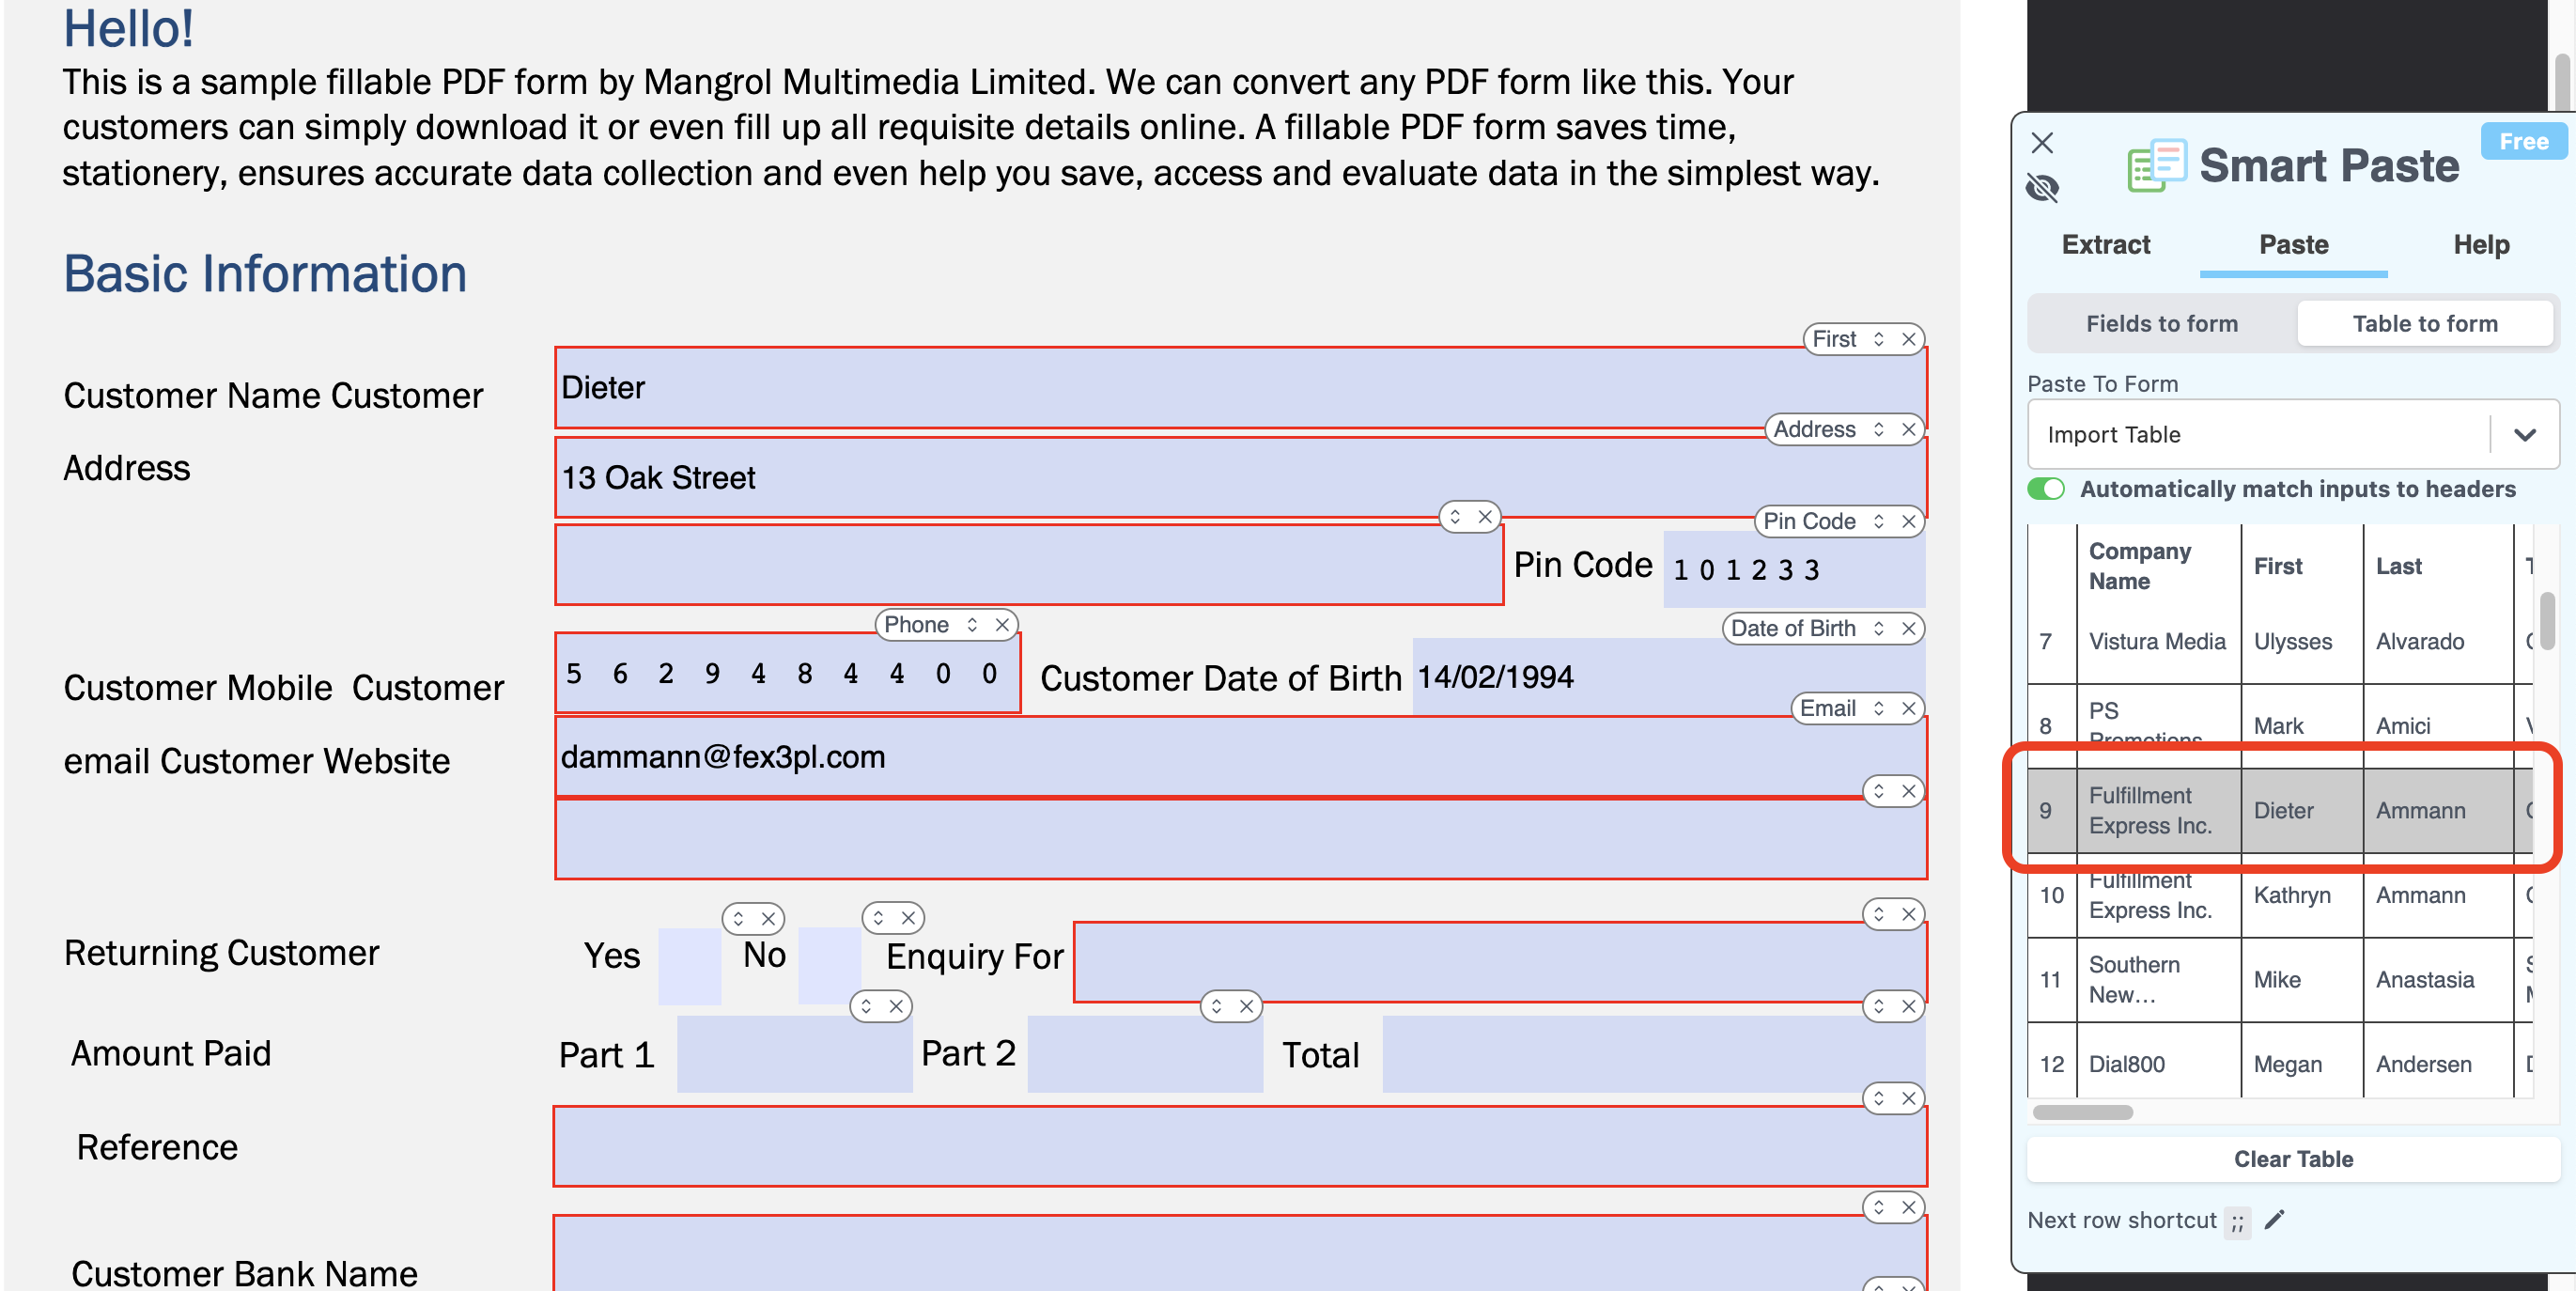
If you refresh the page, the data will persist. It would be as if you stayed on the form!
Pro-tip: You can save even more time by pressing the hotkey ;; at any time to fill in the next row's data. This is really useful when filling in the same form over and over again.
I hope this article helped you set up Smart Paste and helped you fill forms from Excel tables. I know that filling out forms is tedious and can be a huge pain when you've forgotten which row you filled out or made a mistake. But hopefully, this can make your job a little easier.